~ Bonjour, tout le monde ~ in the last sharing, the author completed a rendering of the kitchen scene with a Keyshot, and set up a Flag to do a tutorial at the end. therefore, the sharing in this issue will explain the allocation of some materials and environmental lighting effects in the last case, try to include the key points contained therein, and use the simplest and direct method to complete the rendering of the scene, hoping to be helpful to everyone. The resources needed for this rendering are attached at the end of the article.

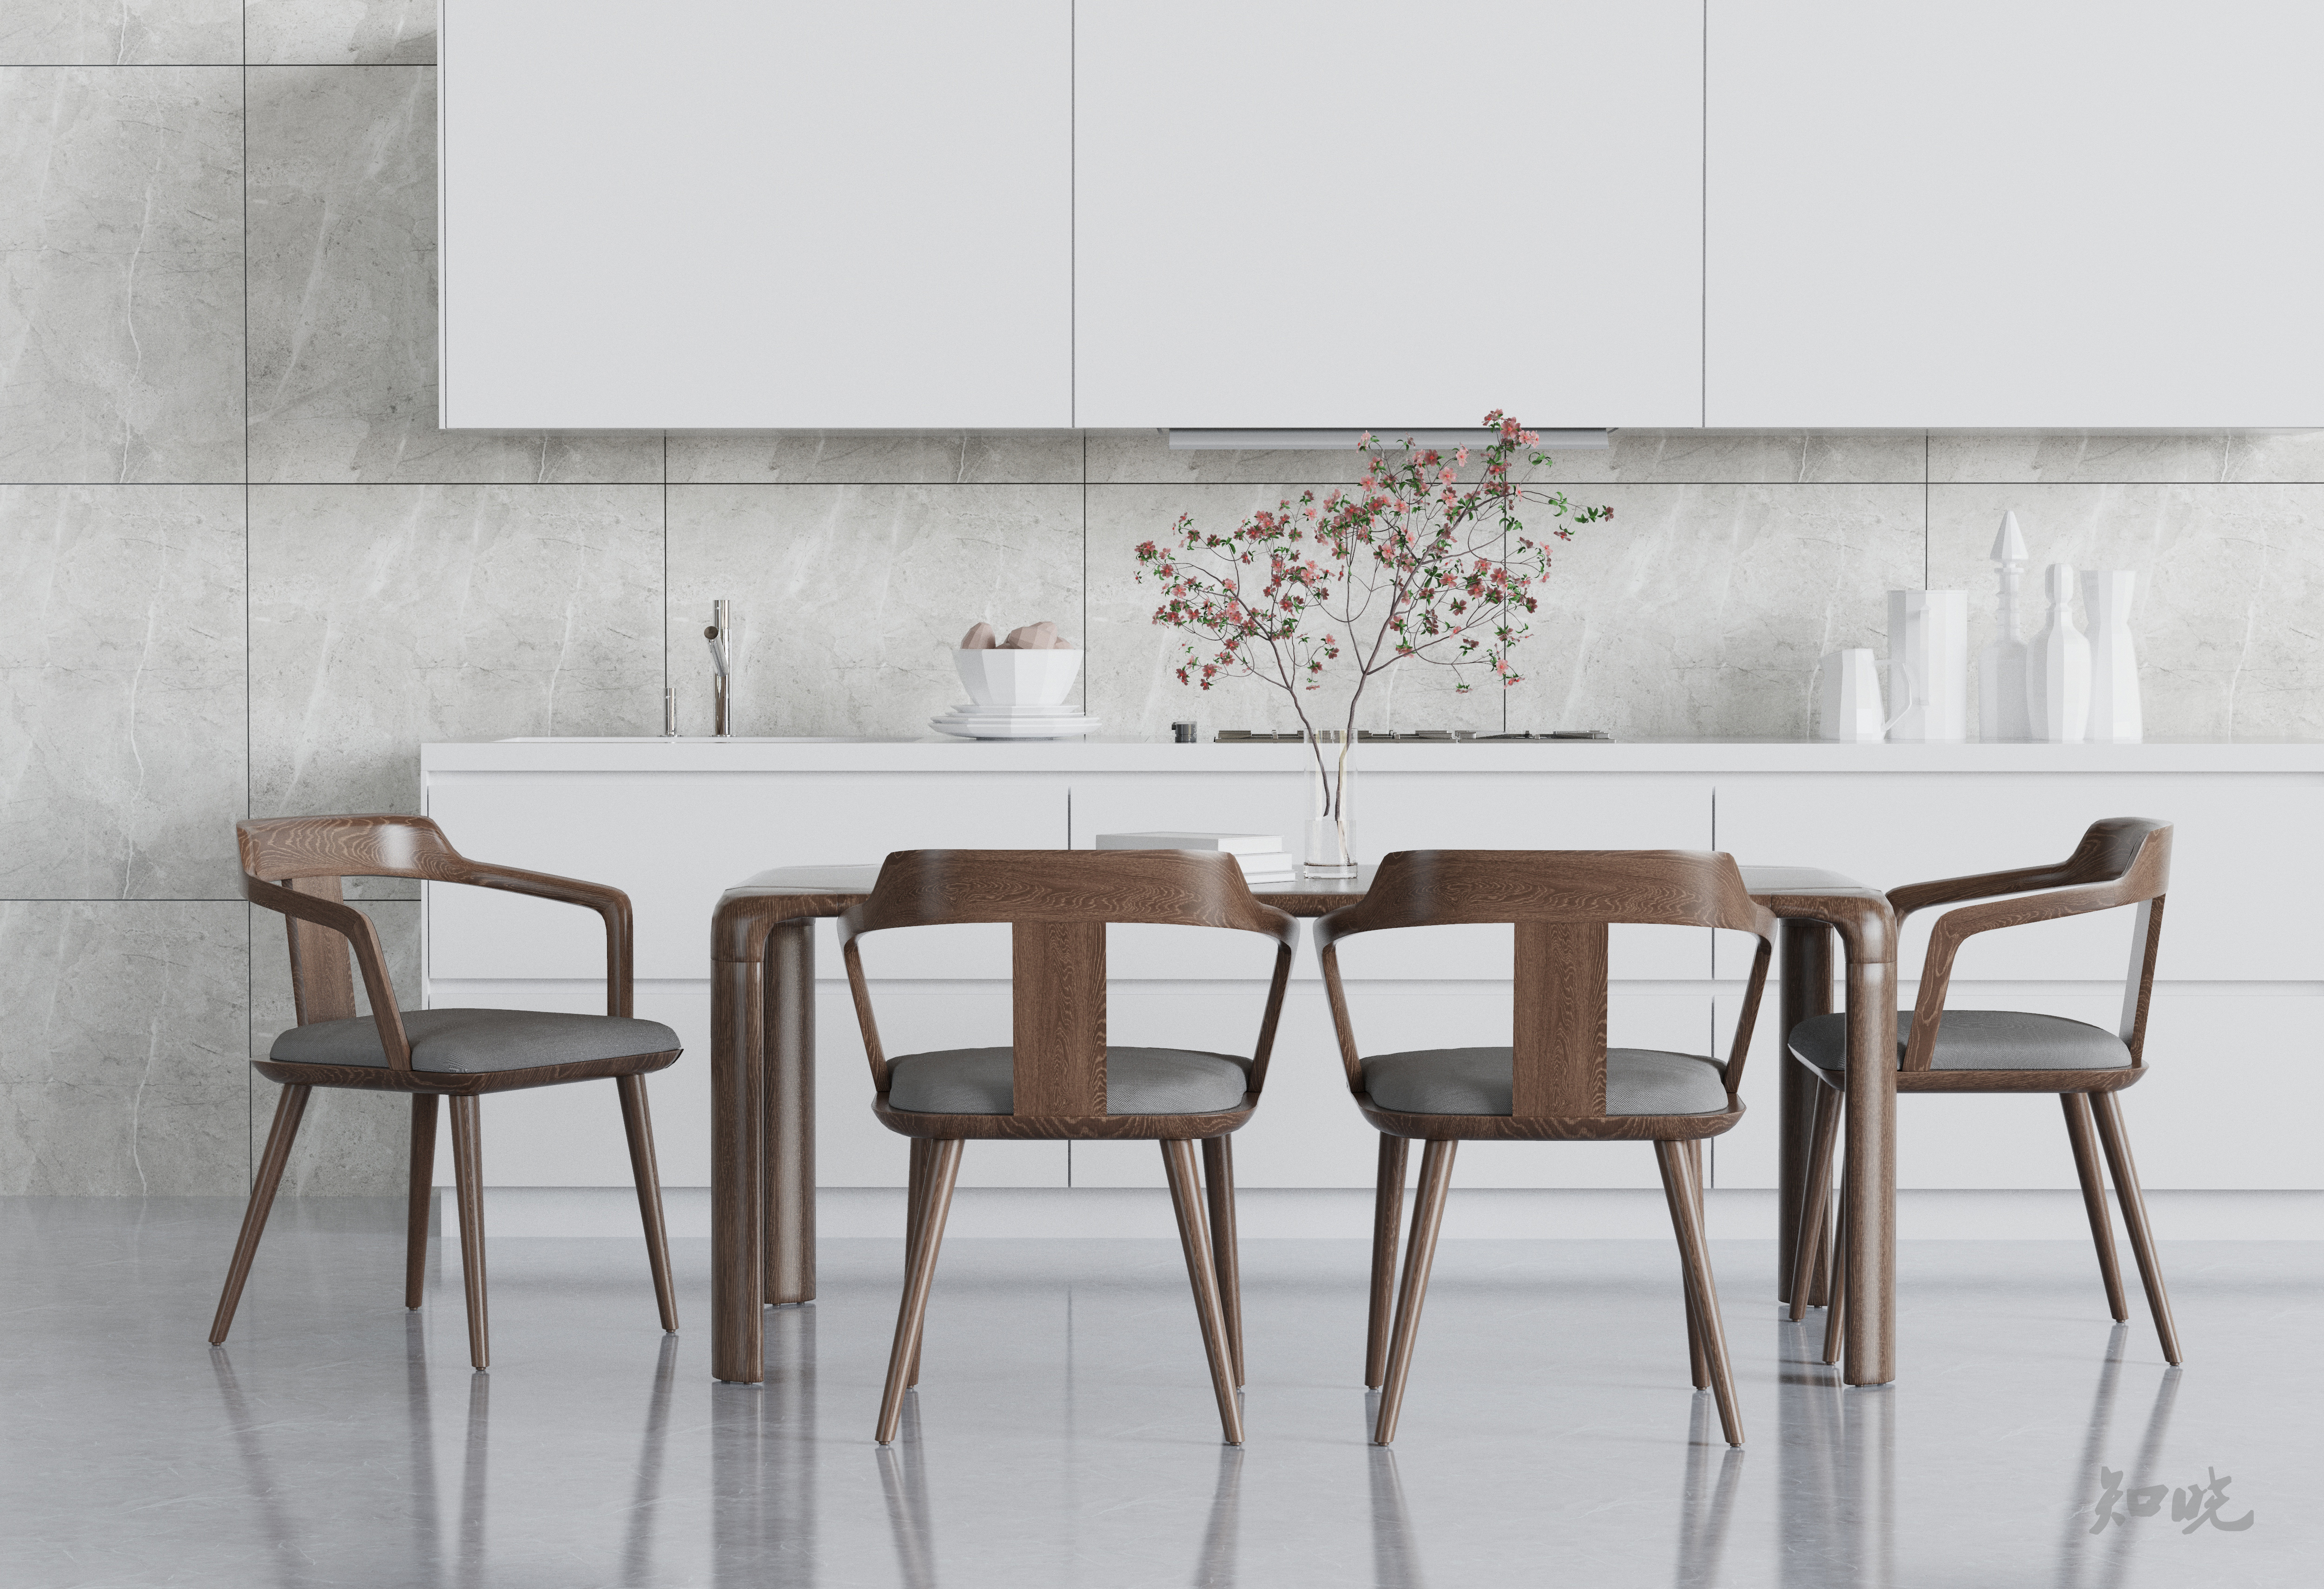
This is the effect of the final rendering. Personally, I think that the core of using Keyshot as a static image is nothing more than the material, environment, and how to allocate the interaction between the material and the environmental lighting effect. Of course, the idea and composition of the scene are also needed. Before, some netizens had doubts about the volume of the scene model and the accuracy of the mapping. The following explanation may be helpful to you.
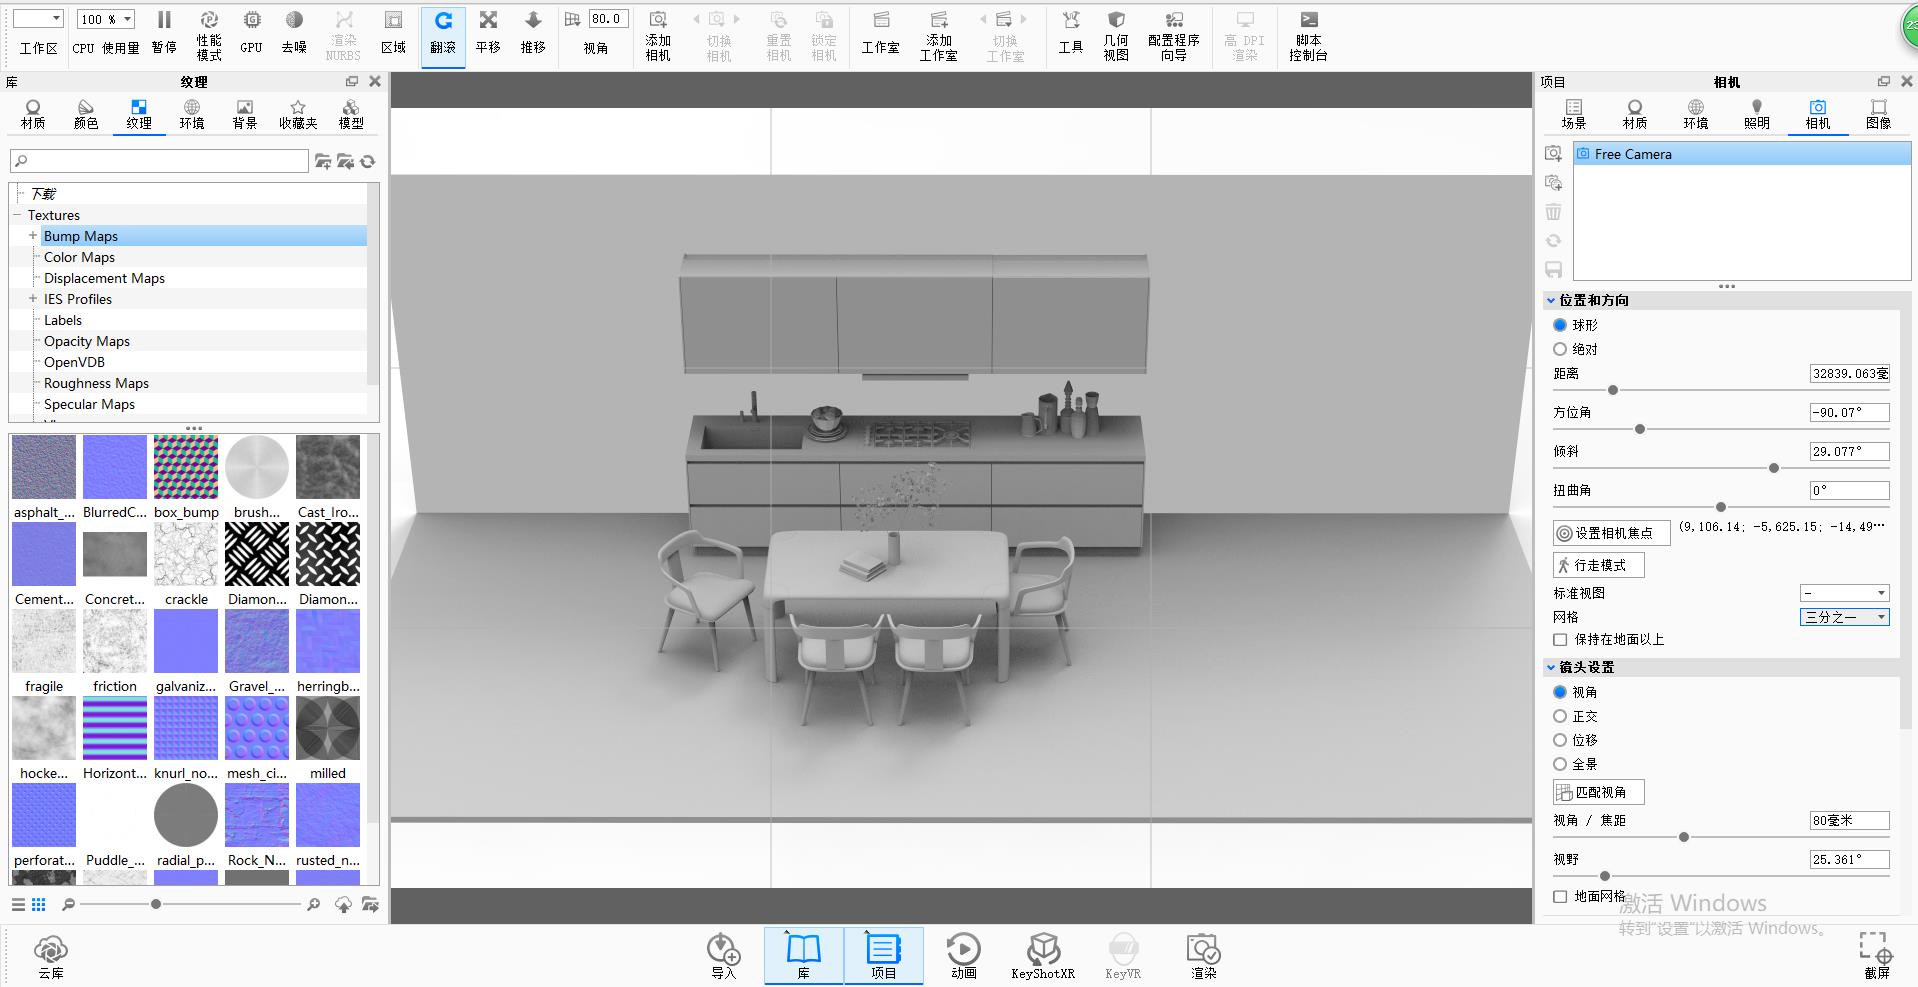
First, let's import the scene model named "Kitchen.FBX" into the Keyshot. The file size here is only 24.2MB. In fact, the large visual volume of the model does not mean that the file is large and will eat hardware. In contrast, the total number of faces of the model will have a more obvious impact on the file size. The lowpoly low modulus is used here, so even if the model looks large and has many objects, it is actually less than 25MB in size.
The material aspect mainly explains cabinets, tables and chairs, flowers, walls and floors. At the beginning of the article, it is mentioned that the simplest and most direct method will be used in this rendering, so the material aspect is also to save adjustment time and rendering resources as much as possible.
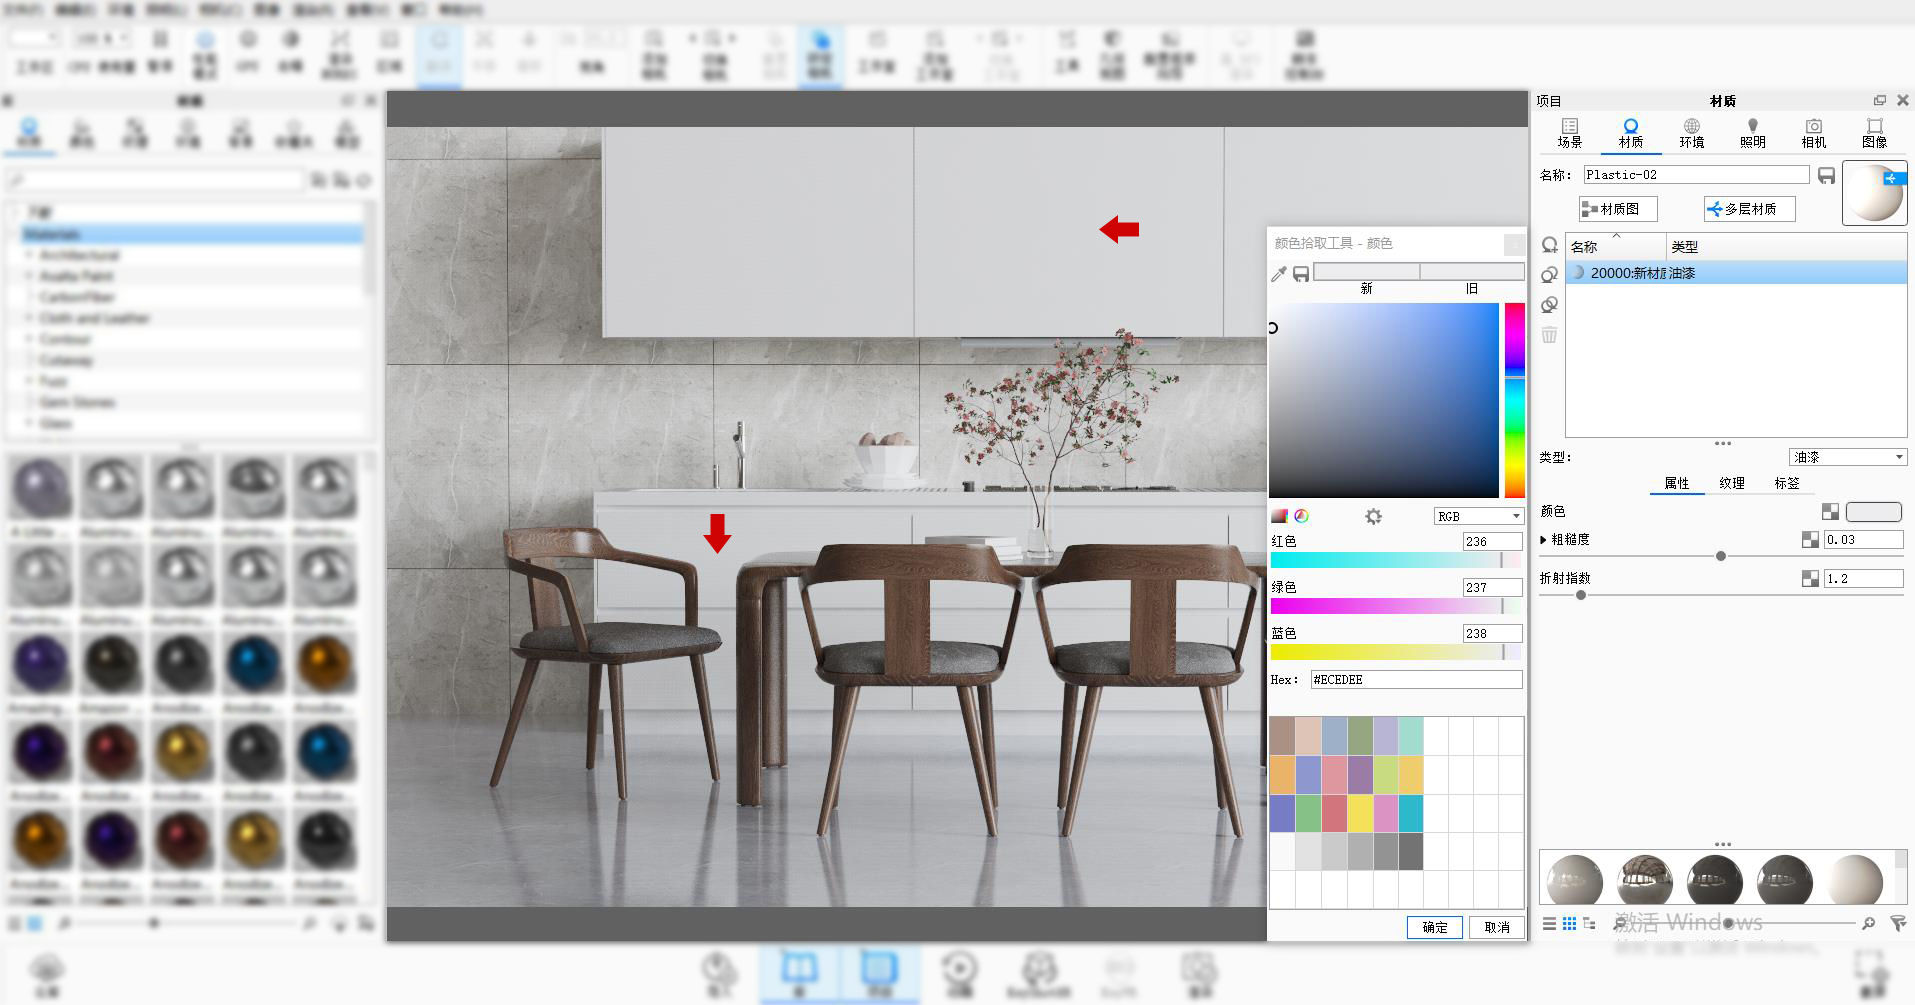
The material of the cabinet is shown in the figure. What is needed is a gray and clean matte effect. With paint material, the color, roughness and refraction index are properly adjusted. The material thus adjusted is relatively insensitive to ambient light and gives people a stable and elegant feeling.
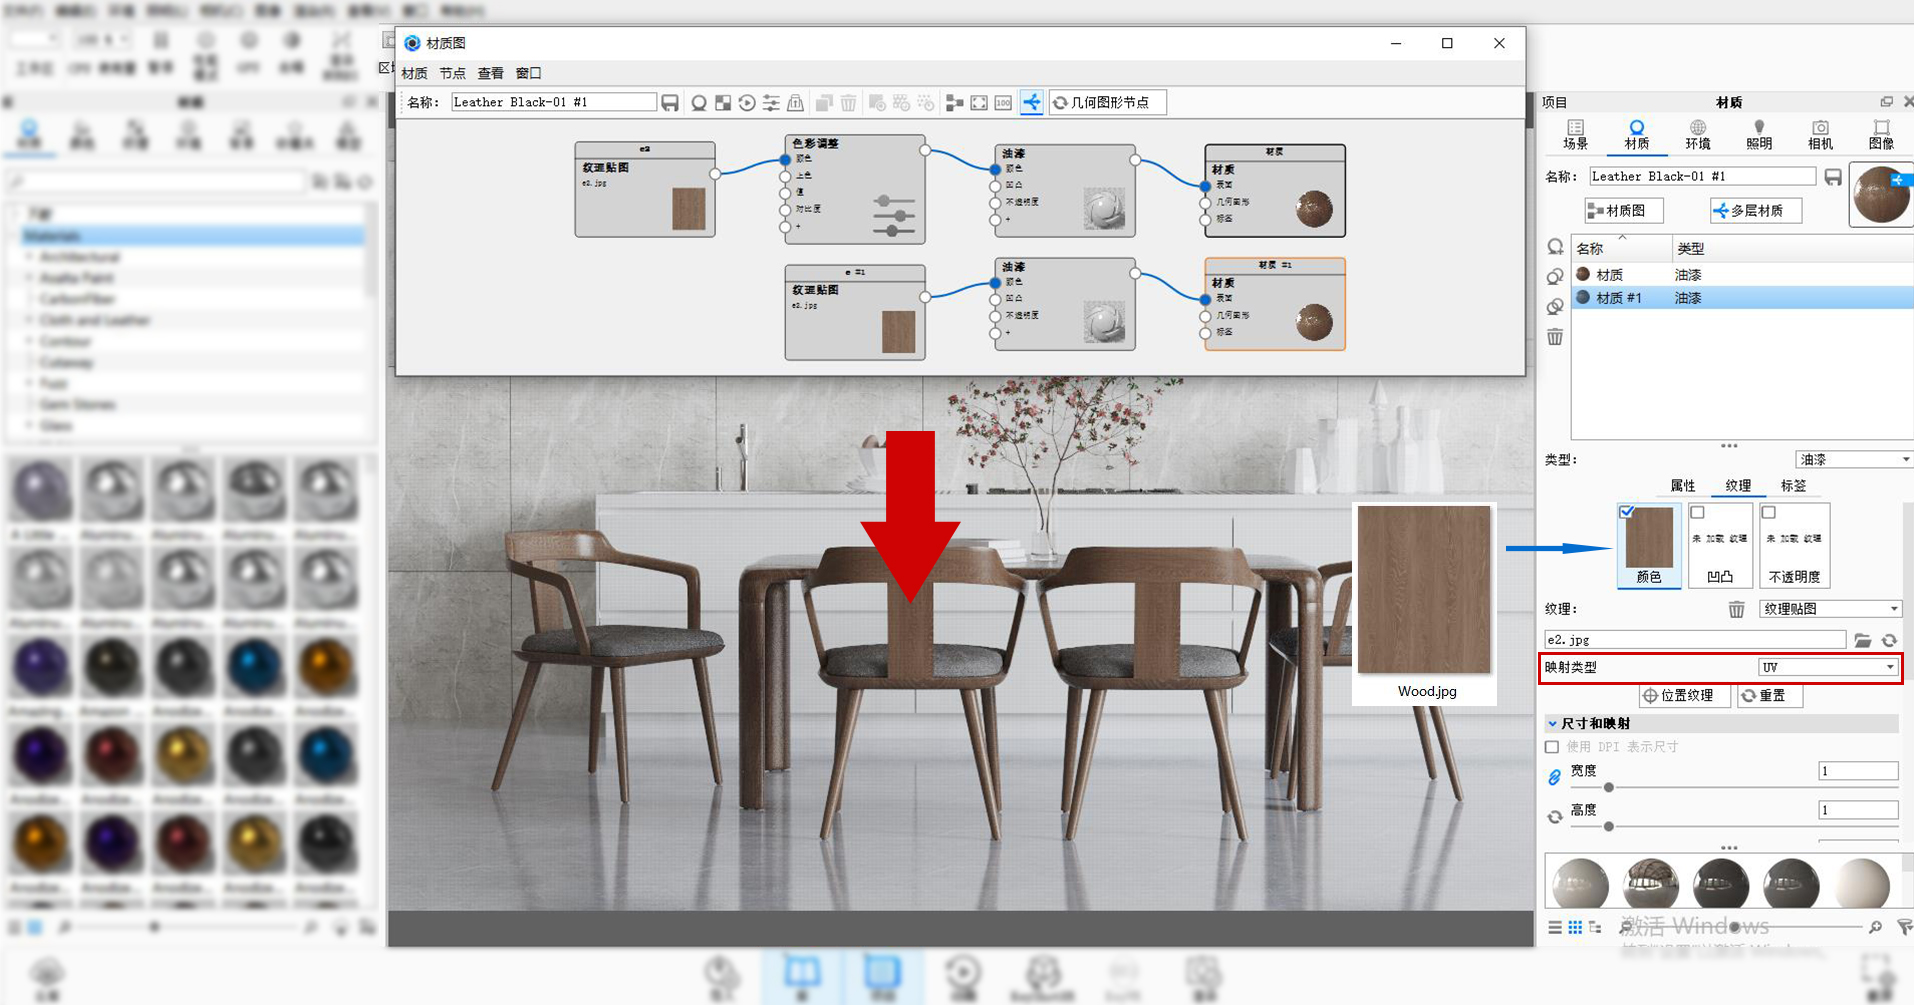
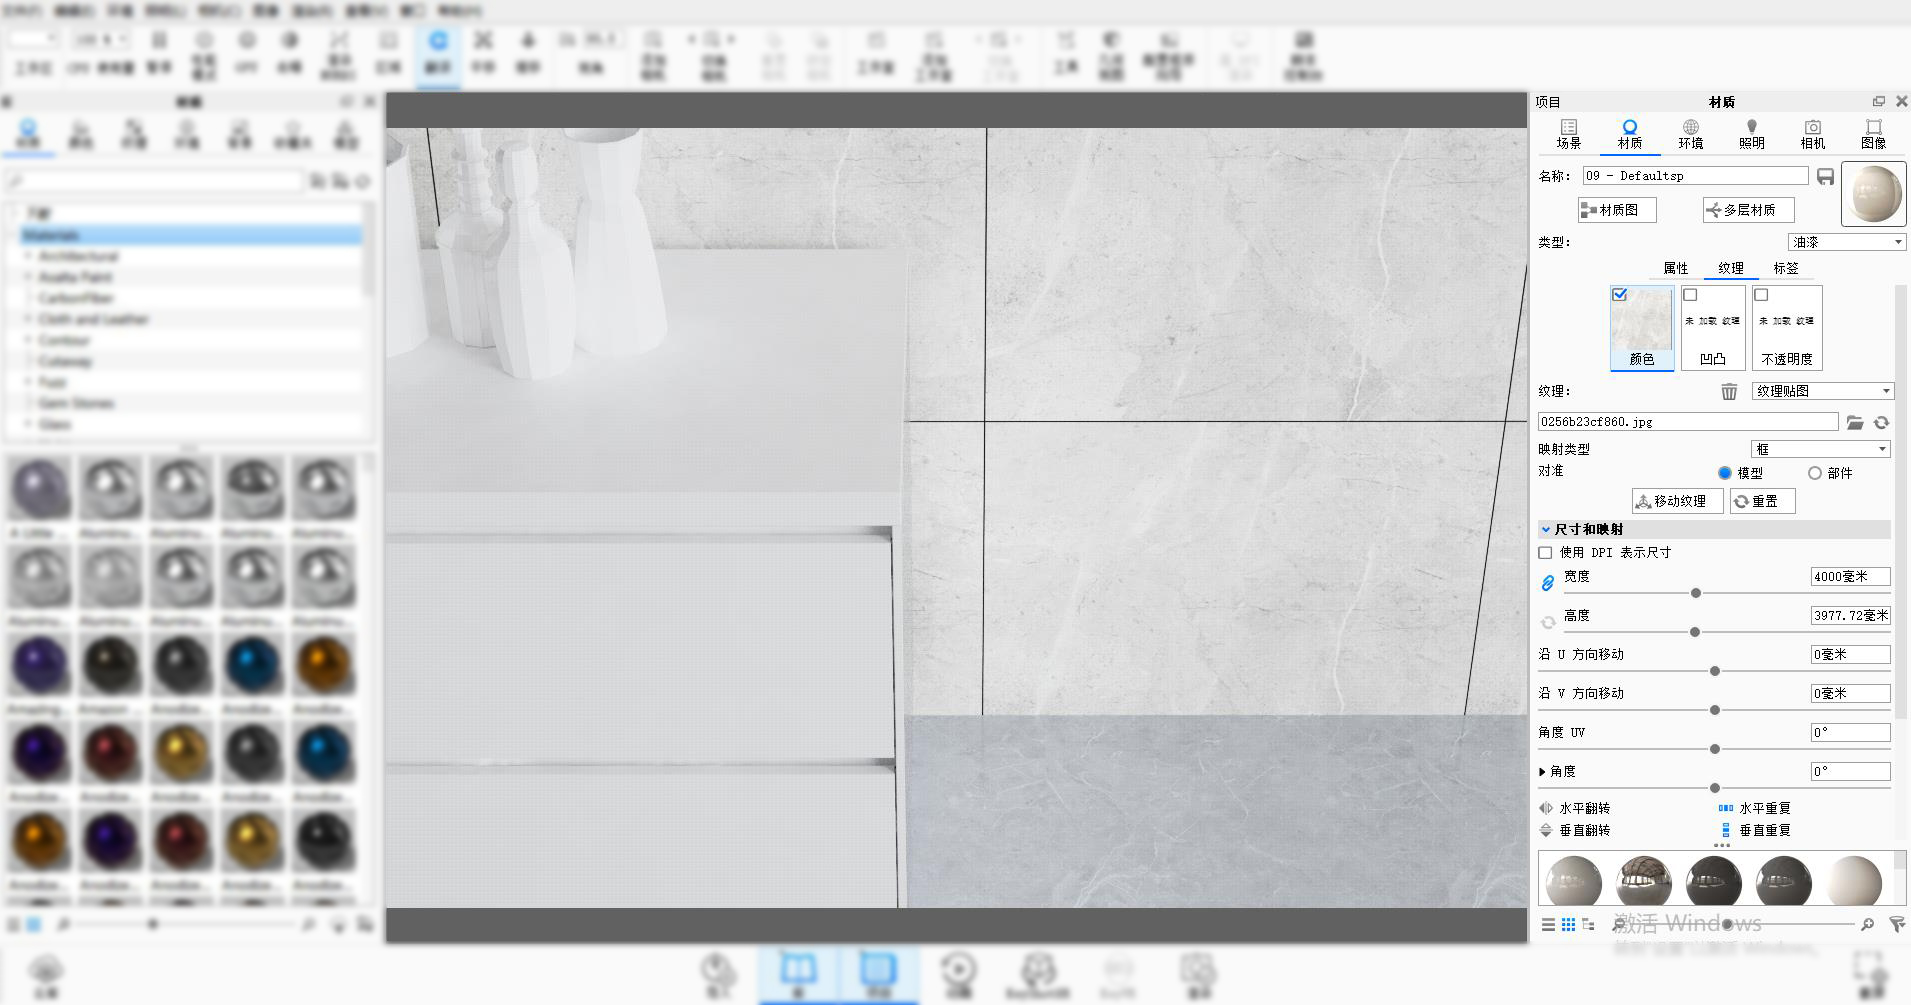
The material of tables and chairs is still simple and crude. On the basis of paint, the corresponding map in the resource pack is guided into the color map, then the mapping type is adjusted to UV (this is worth remembering), and finally a little roughness is added. If you are not satisfied with the color presented by the map, you can also add a color adjustment as shown in the figure to bring up the ideal effect in your mind. (The adjustment of the chair cushion is the same).
For netizens' doubts about the accuracy of mapping: the accuracy of mapping mainly depends on the proportion of the mapped object to the rendered image and the resolution of the final rendered image. If the mapping object needs close-up, the influence of mapping accuracy is more intuitive. If the proportion of flowers is as small as in this case, there is no difference between 2K and 8K, and using maps with higher requirements will waste hardware resources. Then, for high-resolution and high-sampling, put it on the giant screen to see such a requirement, it naturally requires high-precision mapping.
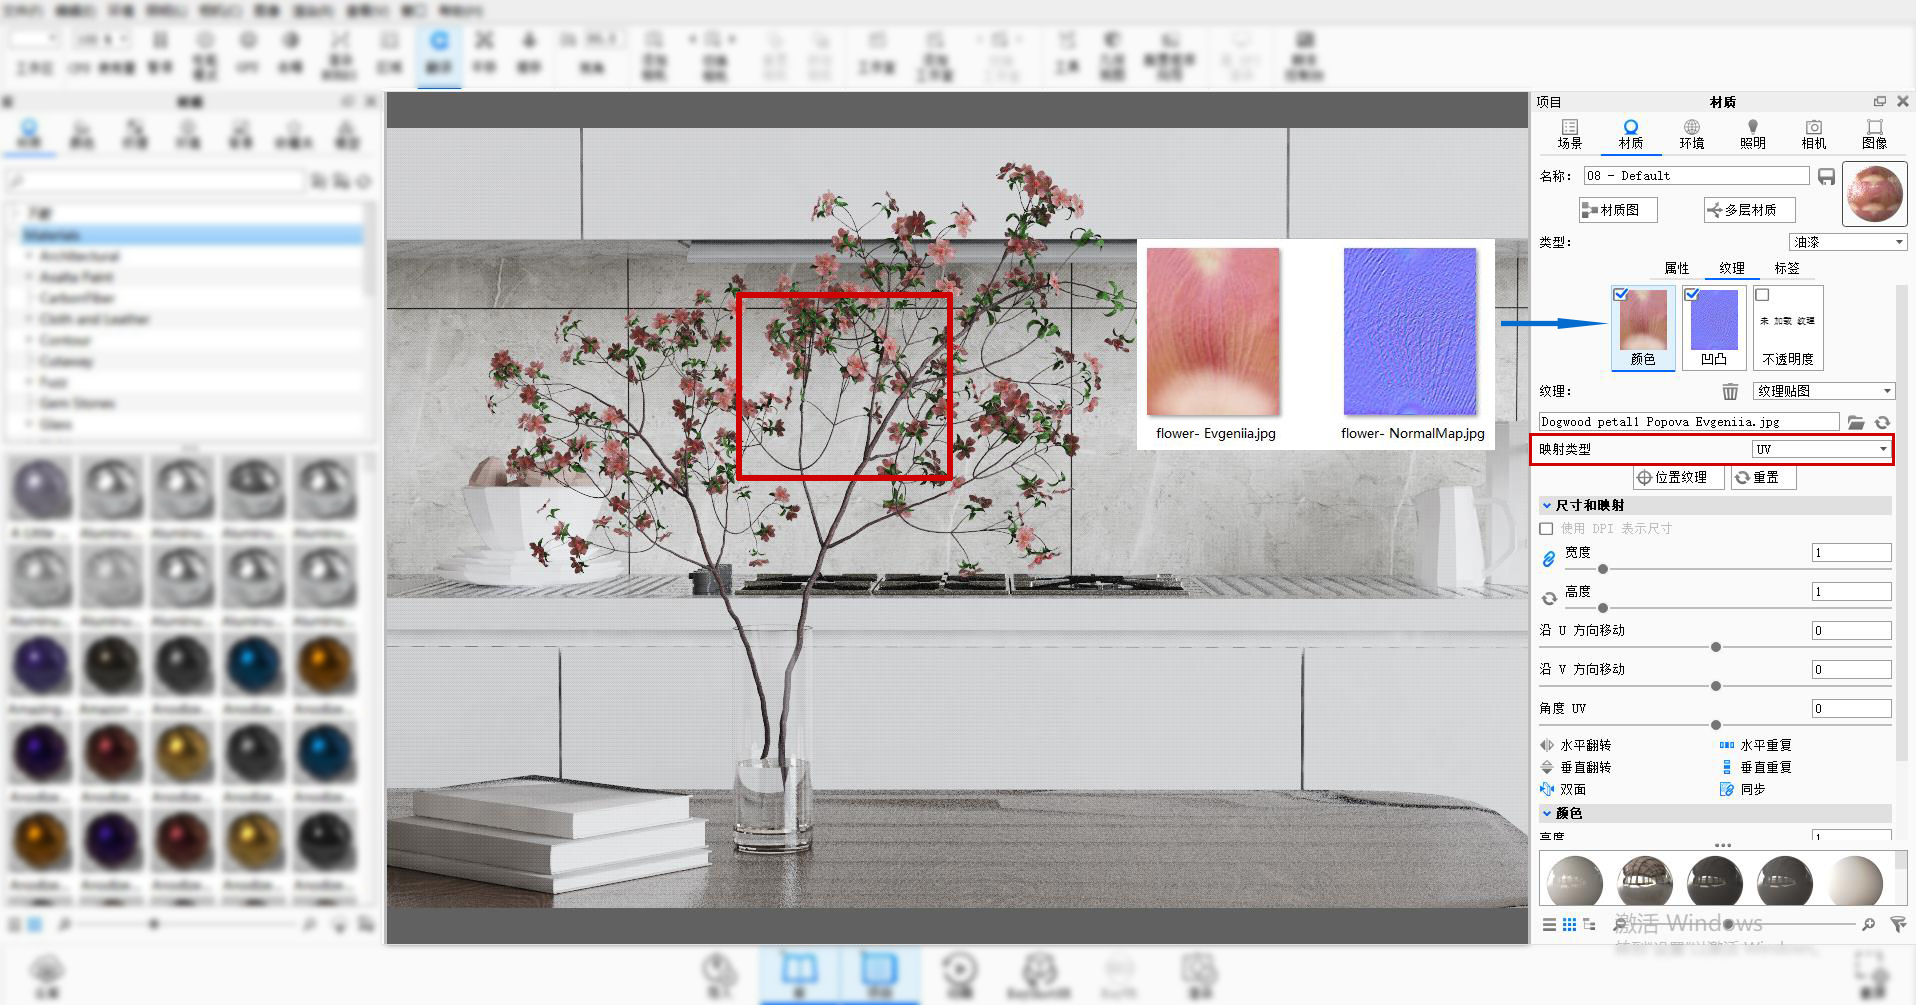
The adjustment method of flowers, branches and leaves on the desktop is the same. On the basis of paint, the color and bump map are guided to the corresponding texture items. The mapping type is UV, because the bump map is Normal type map. Please remember to check the normal map below. (The rendering of items such as green plants, flowers and food basically relies on unfolding the UV during modeling, then drawing the map with software such as substance painter, and finally pasting it when rendering. If there is no corresponding map, it is unrealistic to use only the resources of the material library to allocate the material of such items. I often stumble here when I was a student.)
The wall is still made of paint, import the color map, the mapping type defaults to "box", adjust the size of the map, and finally add a little roughness.
Compared with the wall, the floor here is brighter. Plastic is recommended for the floor material. Of course, paint can be used, but plastic will make it easier to produce results and higher efficiency. Refer to the wall for mapping operation, and finally add 0.01 roughness. If you are not satisfied with the color presented by the floor map, you can also add a color adjustment like the table and chair material to bring up the ideal effect in your heart (the cold tone in the picture is also added with color adjustment).
In addition to the materials explained this time, the rest of the objects are also completed with simple materials as you can imagine.
You can see that a large number of paint materials are used in this rendering, because the paint material adjustment parameters are few in the Keyshot, rendering is fast, saving resources, and also follows the principle of simple and direct rendering.
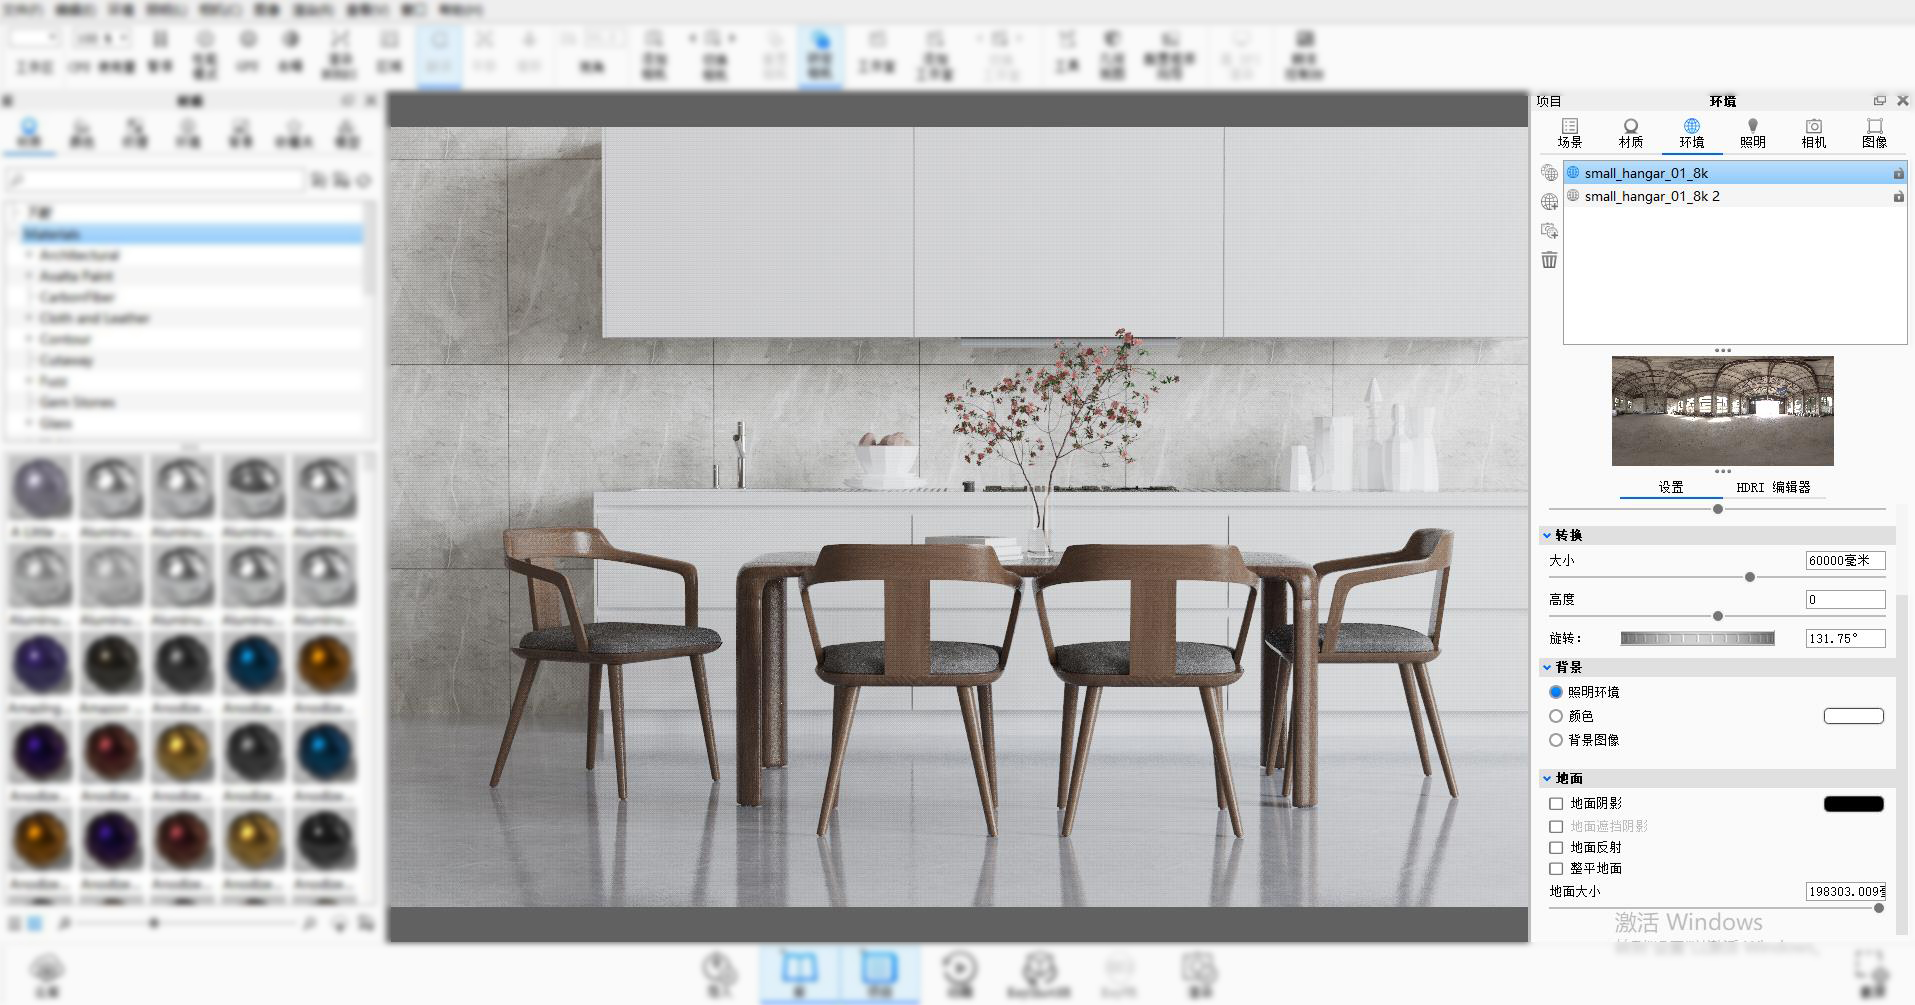
After the material part is completed, it is the turn to adjust the environmental lighting effect. Here, the HDR file in the resource package is imported first.

After importing HDR, many small partners who were full of waiting for the effect found: "This is not what I want at all?!!"
Yes, in fact, material and HDRI are not the focus of this rendering. The adjustment of environmental lighting effect here needs to extend to two other knowledge points, namely image style and lighting algorithm.
For small partners who often use Keyshot to render products, the default image style and lighting algorithm can basically meet most of the rendering requirements at ordinary times, and these two points are naturally easy to become small transparency with low attention.
As can be seen from the above figure, under the "basic" image style, the contrast between light and shade is too strong, and the overall feeling is gloomy and opaque. At this time, we changed the image style to "photography".
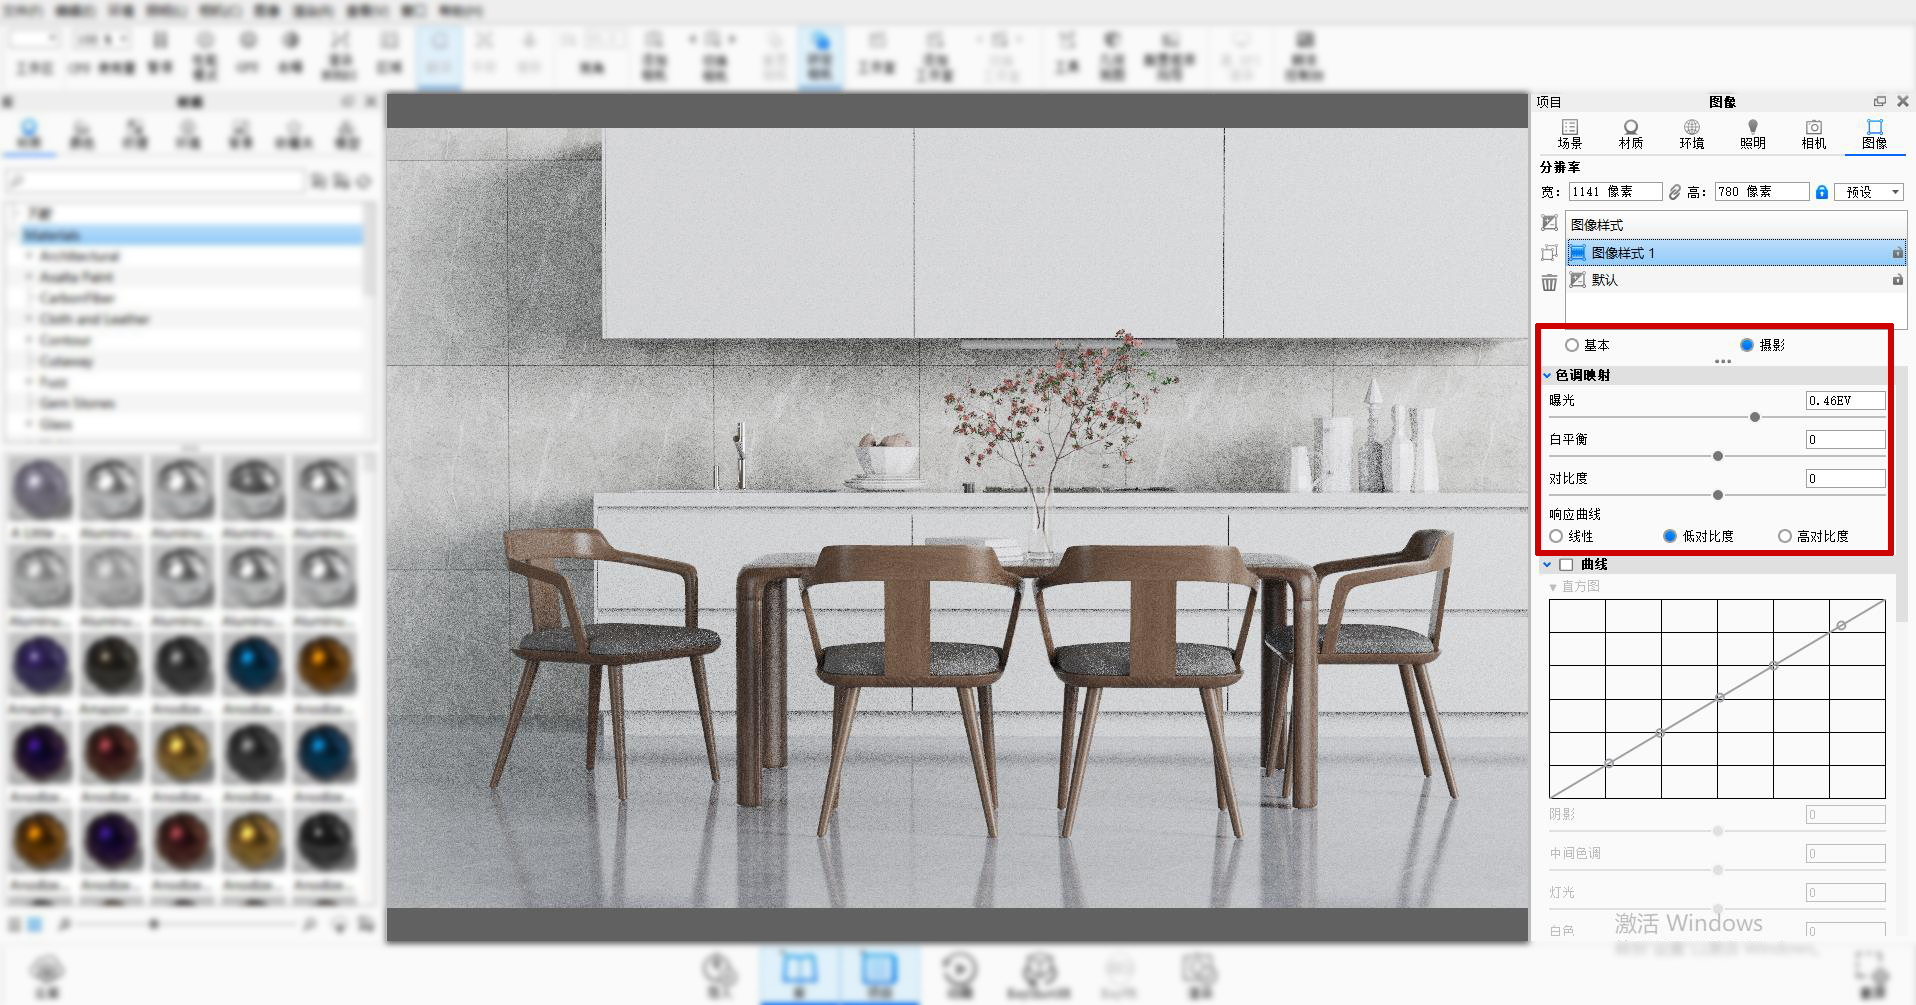
After changing to the photography mode, with a little more exposure, the overall effect began to become clean and transparent, but the picture was still a little pale and lacking in vitality. Next we turn on the lighting options.

The lighting algorithm is changed to indoor mode as shown in the figure. After changing to the indoor mode, it is much closer to the final effect.
For the application of image styles and lighting algorithms, practice makes perfect.
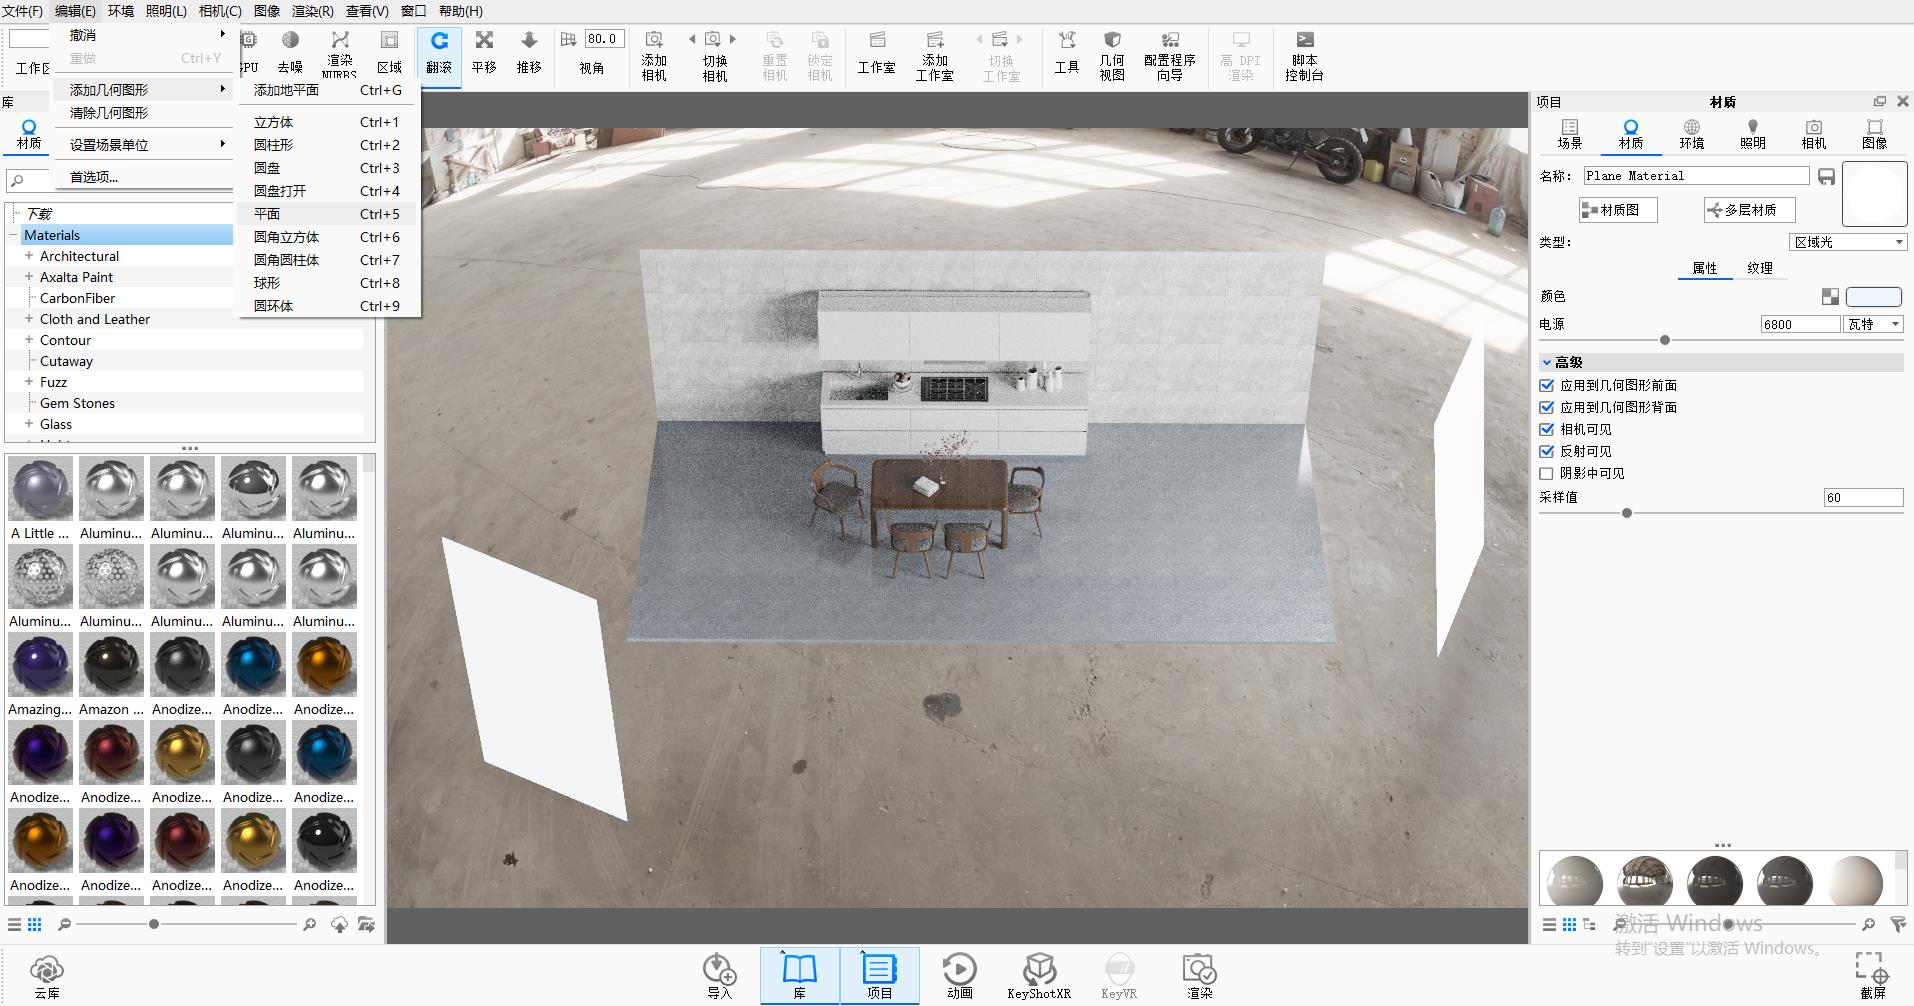
Finally, we add an area of light on both sides of the kitchen to adjust the parameters of the light appropriately. First, we will further brighten and improve the permeability, and emphasize the direction of the light source. Second, we will add fireworks to your heart through the color of the light. The atmosphere rendered by cold light here is quiet, frigid and slightly depressed. The atmosphere of the scene is also a portrayal of the designer's character and mood.
Finally, the resource https://pan.baidu.com/s/1s67B0v_rAjGWuS0oUCk14g needed for this rendering is attached.
Code: cj6n
This case explanation must be mixed with unnecessary contents, which will be a bit long-winded and requires your patience to interpret.
I hope this article will be helpful to you in your struggle.
~Merci ~

新用户?创建账号
登录 重置密码
请输入电子邮件以重置密码。


Extraction code: error, can you update it? Trouble,
The overall effect is great, but when the scene is a little more complicated, the addition of physical light will increase noise and light spots, and it is difficult to solve.
cowhide
Thank you for sharing, can you give me a product's image style and lighting algorithm application skills next time
Can models be shared
Hello, can you share the kitchen model?
Wow, big brother
Capture a big boss
666
Learned
I don't want to learn, you don't send again